

Key Takeaways
- A new heat pump performs best when ductwork, insulation, and airflow are evaluated before equipment is selected.
- Existing ducts may only need sealing, insulation, or limited repairs rather than full replacement.
- Proper system sizing is more important than buying the largest unit available.
- A home energy assessment can identify comfort issues that equipment alone will not solve.
- Professional testing confirms airflow, duct leakage, refrigerant charge, and thermostat operation.
- A detailed project plan can reduce surprises, improve comfort, and make spending more predictable.
Table Of Contents
- Why Planning Matters Before Installation
- How To Check Existing Ductwork
- When To Repair Ducts And When To Replace Them
- Why Insulation And Air Sealing Matter
- How Proper System Sizing Works
- Choosing A System Layout
- What A Quality Installation Should Include
- How To Build A Realistic 2026 Budget
- Steps For Long-Term Performance
- Final Thoughts
Why Planning Matters Before Installation
Replacing an aging heating and cooling system can improve comfort, but the equipment itself is only one part of the project. For homes with central air distribution, ducted heat pumps can be a practical option when the existing duct system is suitable for the new equipment. Duct condition, insulation, airflow, windows, controls, and electrical capacity all influence how the finished system performs.
A whole-home plan helps avoid rushed decisions based only on square footage, a brand name, or the lowest estimate. Before installation starts, homeowners should understand what work is needed beyond the indoor and outdoor units. This may include duct repairs, a new return path, electrical updates, condensate drainage, thermostat changes, or insulation improvements.
Planning also creates a clearer comparison between proposals. One contractor may include commissioning and duct sealing, while another may only quote equipment replacement. Looking at the complete scope makes it easier to identify what each price actually covers and whether important performance work has been left out.
How To Check Existing Ductwork
Start with a visual inspection of accessible ducts in attics, crawl spaces, basements, garages, and utility areas. Look for disconnected joints, crushed flexible duct, rust, torn insulation, unsupported sections, and gaps around registers. Pay close attention to areas outside the conditioned part of the house, where hot or cold air losses are more likely.
Appearance does not tell the entire story, so testing is valuable. Duct systems can lose 20% to 30% of moving air through leaks, holes, and poor connections, which can create high utility bills and rooms that never feel right. A qualified contractor can measure static pressure, inspect supply and return airflow, and identify leakage or restrictions that are hidden from view.
Items Worth Reviewing
- Supply and return connections at the equipment and registers.
- Flexible duct that has sharp bends, kinks, or sagging runs.
- Insulation on ducts located in unconditioned spaces.
- Return openings that may be too small for the proposed airflow.
- Rooms with weak airflow, excessive noise, or uneven temperatures.
When To Repair Ducts And When To Replace Them
Older ductwork does not automatically require replacement. Sealing accessible joints, replacing a damaged branch run, correcting a disconnected return, and adding insulation can solve many common problems. These repairs are often easier to complete while the HVAC equipment is already being replaced.
Replacement becomes more reasonable when ducts are extensively undersized, collapsed, contaminated, poorly routed, or damaged in several locations. A major remodel may also justify a new layout, especially if walls or ceilings are already open. The decision should come from the duct system’s condition and measured performance, not its age alone.
- Test the current duct system before approving a replacement plan.
- Separate simple leakage problems from major design limitations.
- Compare the cost of repairs with the cost and disruption of replacement.
- Confirm that the proposed equipment can work with the final duct layout.
- Request airflow verification after the installation is complete.
Why Insulation And Air Sealing Matter
A heating and cooling system cannot fully overcome a weak building envelope. Thin attic insulation, air leaks around doors and windows, poorly sealed penetrations, and sun-heavy rooms can cause comfort complaints even when the equipment is operating normally. Improving those areas may reduce the load the new system must handle.
A professional assessment can review utility history, comfort concerns, insulation, moisture, ventilation, and mechanical equipment in one process. A home performance assessment evaluates the home envelope and mechanical systems, then helps prioritize improvements based on safety, comfort, and cost. This is especially useful when one room is consistently uncomfortable or when the home has undergone additions or renovations.
How Proper System Sizing Works
Bigger is not necessarily better. An oversized system may reach the thermostat setting quickly, cycle on and off too often, and provide less consistent humidity control during the cooling season. An undersized system may struggle during periods of extreme outdoor temperatures.
A qualified contractor should use a room-by-room load calculation rather than a simple rule based on home size. The calculation should account for local climate, insulation levels, window area, orientation, air leakage, ceiling height, occupancy, appliances, and solar gain. Ask for a written summary showing the heating load, cooling load, equipment capacity, target airflow, and any expected supplemental heat requirements.
Choosing A System Layout
Homes with accessible, properly sized ducts may be good candidates for a central ducted setup. This approach uses familiar registers and can provide consistent whole-home distribution when the duct system is sealed and balanced. It can be especially appealing for homeowners who want one primary system and a conventional thermostat experience.
Homes without usable ducts have other choices. Ductless units can serve individual rooms or zones, while small-duct systems may work in certain renovations where full-size duct runs are impractical. A hybrid design can also make sense when an addition, finished attic, converted garage, or frequently unused area needs independent control.
What A Quality Installation Should Include
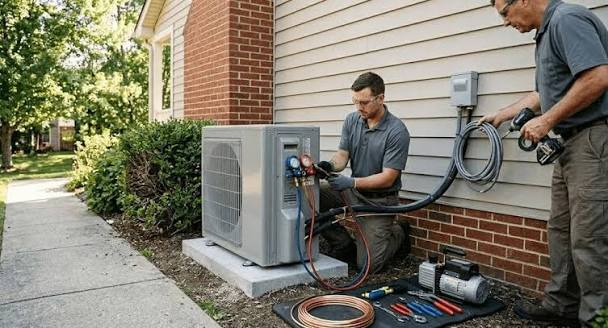
Good equipment needs good installation practices. The contractor should verify electrical service, equipment support, refrigerant line routing, condensate drainage, controls, and clearances before work begins. The project should finish with operational testing, not simply turning the system on and confirming that air is coming from the vents.
- Written load calculations and equipment selection details.
- Sealed supply and return connections.
- Verified airflow and static pressure.
- Correct refrigerant charge and electrical connections.
- Reliable condensate drainage and thermostat setup.
- Heating and cooling performance tests.
- Clear homeowner instructions for filters, controls, and backup heat.
How To Build A Realistic 2026 Budget
A useful budget includes much more than the price of the equipment. Permit fees, electrical work, duct repairs, thermostats, drainage changes, insulation, labor, disposal, and access challenges can all affect the final total. Request itemized estimates so each cost is visible before work begins.
When comparing quotes, review the equipment model, capacity, efficiency ratings, warranty terms, included accessories, and testing procedures. A lower quote may omit duct improvements, electrical upgrades, or commissioning. Those exclusions can lead to additional spending later, or they can leave the new system operating below expectations.
Steps For Long-Term Performance
Routine care helps protect comfort and efficiency after installation. Replace filters on the recommended schedule, keep outdoor equipment clear of leaves and debris, and watch for unusual sounds, water near the indoor unit, weak airflow, or recurring temperature differences between rooms.
Professional maintenance should include electrical inspection, coil and drain checks, airflow review, and control testing. Keep records of service visits and repairs. A simple history can reveal repeat problems, support warranty claims, and help technicians diagnose issues more quickly.
Final Thoughts
A successful heat pump upgrade starts with the house, not just an equipment brochure. Checking ductwork, insulation, airflow, electrical service, and room-by-room loads can prevent costly surprises. When strong existing ducts are retained, and weak areas are corrected, homeowners are more likely to get steady comfort, practical operating costs, and dependable performance for years to come.
read more :Why Limited Edition Screen Prints Are Worth Collecting